Navigational button : Tan Shi Yuan and Tai Qiu Xian
Narration audio recording : Yap Yen Yin and Tan Hui Zhen
Background music : Tan Shi Yuan and Yap Yen Yin
Sound Effects : Tai Qiu Xian
Graphics and Typography : Low Jee Yen and Yap Yen Yin
Visual ideas : Low Jee Yen, Tan Shi Yuan,
Tai Qiu Xian, and Yap Yen Yin
Blog and Reports : Low Jee Yen ( Blog Design ) ,
all Group Members ( reports )
Monday, May 16, 2011
Distribution of tasks.
CG3 Assignment 3 - A musical typography
Our theme is 'diversity unites us', inspired by today's multicultural society.
We made the entire video using Adobe Flash (Adobe illustrator for drawing), hence, it starts with a navigational button. And as it is in video format you are unable to click it. Anyway, enjoy!
We made the entire video using Adobe Flash (Adobe illustrator for drawing), hence, it starts with a navigational button. And as it is in video format you are unable to click it. Anyway, enjoy!
The process in creating the play button.
As found in our group blog - http://cancolors.blogspot.com
Here is the step that I am going to show on how to create a play button.
Here is the step that I am going to show on how to create a play button.
First, open a new file which is in ActionScript 2.0 .


Select Pain Bucket Tool to create a gradient view on those circles.


As yo can see, the button will be in 3D looked.

Then, I would like to convert it into symbol.
To convert it to symbol, highlight the whole button.


This image showed that if you don't want the button to appear at the on going frames, press on F7, then the button will disappear. And you may continue your work on the next frames.


The sound effect will be put at the Down frame.


A symbol will be shown after you have located the sound effect.


Finally, I have done the button. It can be smoothly function if the action script are not wrong. Since lots of peoples face the problems on the action script that causes them could not play their button.
At here, I would like to share a video as reference on how to creating a play button.
Wednesday, April 6, 2011
CG3 Assignment 2
I've done my CG3 Assignment 2 with a few simple steps using Adobe Flash CS5.
 Before that, I used Adobe Illustrator to create my background.
 I clicked File > Import to stage to insert background.
 I used Motion Tween to make the lines move and used shape tool to create it.
 Using Motion Tween, we can direct the word to move accordingly.
 I used free transform to do the zooming part.
 For the last part, I've decided to change the colour so that it stands out.
 My typographic video is finally done. =)
 Before that, I used Adobe Illustrator to create my background.
 I clicked File > Import to stage to insert background.
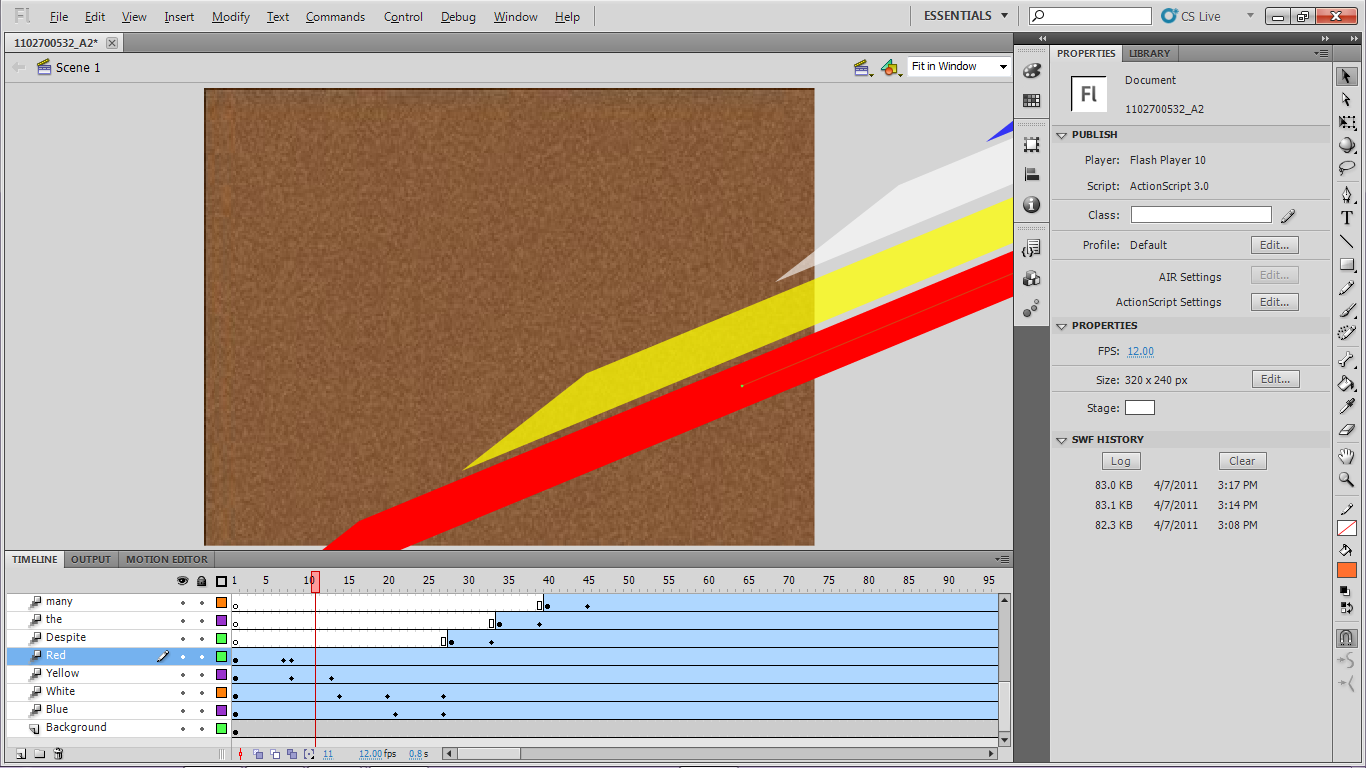 I used Motion Tween to make the lines move and used shape tool to create it.
 Using Motion Tween, we can direct the word to move accordingly.
 I used free transform to do the zooming part.
 For the last part, I've decided to change the colour so that it stands out.
 My typographic video is finally done. =)
Saturday, February 12, 2011
Loy Krathong Song
Click the play button to play the song with video. =)
Original Thai version
Another song but Chinese version
Original Thai version
Another song but Chinese version
Sunday, November 28, 2010


Thursday, November 18, 2010
E-wallpaper
The E-wallpaper is finally done! I'm doing Thailand's Loy Krathong festival a.k.a. Festival of Floating Bowls. The detailed description is in the previous post.
Now, here are the steps to the completion of my wallpaper:
 Firstly, you have to open Photoshop in order to begin.
Clcik on File > New and customize the size to be an A4 with a resolution of 72 pixels.
 Secondly, you open up the picture that you want to use.
 I cropped the image out using lasso tool.
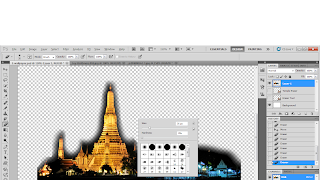
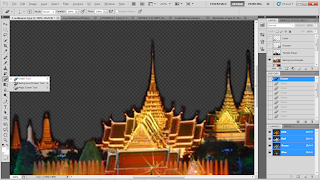
 This is the image after cropping out.
 After that, I use the eraser tool to erase off the extras.
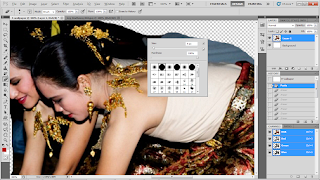 You can set the brush size by just right-clicking the mouse.
You can even set the hardness of the eraser as well.
 Next, I open another image that I want.
 Repeating the same steps as before, cropping it out with lasso tool.
 Right-click to select copy and paste or using keyboard shortcut, Ctrl + C and Ctrl + V to copy and paste the images to the same location.
 After that, erase off the excess of the background that is not needed using eraser tool.
Set the hardness to 0% to get a blurry effect.
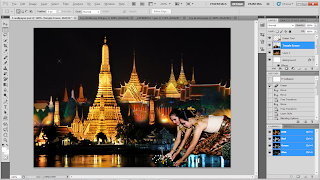
 Double click on the background and adjust it's setting.
 And here is the outcome with colour overlay.
 To open a new image, repeat the same steps again by clicking File > Open.
 Select the image that you want and open it.
 This time, I didn't make any changes. I just apply the image right at the very back.
Arrange it in the layers.
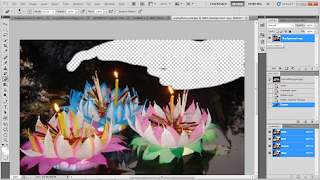 I opened another image but I didn't crop out this time. Instead, I just use the eraser tool to erase the background and keep on the lotus.
 Zoom in or Ctrl + to see the edges more clearly.
This is the outcome.
 Copy and paste the lotus image with the rest. Using selection tool, move the image to where you want it to be.
 Lock all other layers except the one that you want to work on to make some adjustments.
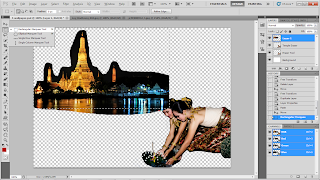
I erased off the dark sky to make the fireworks more visible.
 Using selection tool, select the image and copy it.
 Paste it on the your wallpaper. Then adjust to where you want it to be.
 Next, use text tool to type out the words of your choice.
 Select the type of font you want in the type gallery.
You can also adjust the size of the words and the colours.
 Move the words around to place it where you want it to be.
Make sure the words are visible.
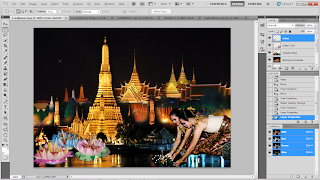
 And this is the final outcome. =)
Now, here are the steps to the completion of my wallpaper:
 Firstly, you have to open Photoshop in order to begin.
Clcik on File > New and customize the size to be an A4 with a resolution of 72 pixels.
 Secondly, you open up the picture that you want to use.
 I cropped the image out using lasso tool.
 This is the image after cropping out.
 After that, I use the eraser tool to erase off the extras.
 You can set the brush size by just right-clicking the mouse.
You can even set the hardness of the eraser as well.
 Next, I open another image that I want.
 Repeating the same steps as before, cropping it out with lasso tool.
 Right-click to select copy and paste or using keyboard shortcut, Ctrl + C and Ctrl + V to copy and paste the images to the same location.
 After that, erase off the excess of the background that is not needed using eraser tool.
Set the hardness to 0% to get a blurry effect.
 Double click on the background and adjust it's setting.
 And here is the outcome with colour overlay.
 To open a new image, repeat the same steps again by clicking File > Open.
 Select the image that you want and open it.
 This time, I didn't make any changes. I just apply the image right at the very back.
Arrange it in the layers.
 I opened another image but I didn't crop out this time. Instead, I just use the eraser tool to erase the background and keep on the lotus.
 Zoom in or Ctrl + to see the edges more clearly.
This is the outcome.
 Copy and paste the lotus image with the rest. Using selection tool, move the image to where you want it to be.
 Lock all other layers except the one that you want to work on to make some adjustments.
I erased off the dark sky to make the fireworks more visible.
 Using selection tool, select the image and copy it.
 Paste it on the your wallpaper. Then adjust to where you want it to be.
 Next, use text tool to type out the words of your choice.
 Select the type of font you want in the type gallery.
You can also adjust the size of the words and the colours.
 Move the words around to place it where you want it to be.
Make sure the words are visible.
 And this is the final outcome. =)
Subscribe to:
Posts (Atom)